If you’ve ever looked at a well-loved down jacket—one that’s been to fall festivals, ski runs, and casual coffee runs—and spotted a 2-inch tear along the sleeve or a small gash near the hem, you’ve probably asked yourself: “Can I repair this myself?” As a down jackets supplier who’s spent 10 years sourcing, testing, and fixing every tear, snag, and leak that comes through our team’s workshop, I’m here to break this down honestly. The short answer is: yes, you can—if you do it right, and only for certain types of tears. A botched repair can ruin the jacket’s loft, trap moisture, or even make the tear worse. Let’s walk through what you need to know, step by step, based on how our repair team fixes damaged gear before it gets sent back to customers. Down Jackets

First, let’s talk about what makes down jackets different from other outerwear. A regular cotton jacket tear is just fabric; a down jacket tear has a hidden layer inside—usually a lightweight nylon or polyester shell stitched over a lofty inner down chamber. That inner layer is what keeps the down from shifting into one clump, so if you rip that inner layer, you risk losing down insulation every time you wear it. That’s the big mistake people make when they grab a needle and thread at 2 a.m.: they fix the outer shell but not the inner down chamber, leading to feathers popping out weeks later.
Let’s start with the “can I even attempt this?” test. Small tears (less than 2 inches) in the outer shell only? Go for it. Tears in the inner down chamber (you’ll see down feathers poking out from the tear) that are less than 1 inch? That’s doable for a DIY project. Tears longer than that, or tears along a seam? I’d recommend leaving it to a professional, but if you’re crafty, we’ll cover how to approach that too.
Now, the supplies you need—no fancy stuff, just what we keep in our workshop’s on-the-go repair kit. First, you need a down jacket-specific repair patch, not a random iron-on patch from the craft store. Those generic iron-ons have a thick adhesive that can block the outer shell’s breathability and even damage the fabric if you leave it on too long. We use thin, flexible nylon patches designed for down jackets; they’re available online from most outdoor gear brands, or you can pick them up at most hiking supply shops. Next, you need a down-safe thread—regular cotton or polyester thread is too stiff, and it can cut through the delicate down jacket fabric over time. We use fine, nylon thread that’s the same color as your jacket’s outer shell, so it’s invisible once sewn. You’ll also need a curved upholstery needle (the kind with a large eye and a curved tip) because straight needles can’t fit into the tight, curved seams of down jacket panels. Finally, a small pair of sharp fabric scissors, a lint roller, and a hair dryer. That’s it. No glue guns, no weird adhesives—those can ruin the insulation.
Let’s walk through the step-by-step DIY repair, starting with the easiest scenario: a small outer shell tear, 2 inches or less, no down poking out. First, prep the area. Lay your jacket on a flat, clean surface (a wooden table works best) and close any zippers, so the fabric isn’t stretched tight. If there’s any dirt or fuzz on the tear, gently roll a lint roller over the area to remove it—dirt under the patch can create a bumpy surface that will peel off later. Next, cut your repair patch: it should be at least 1 inch larger than the tear on all sides. So if your tear is 1 inch long, cut a 3-inch by 1.5-inch patch. Make sure the patch is cut from the same direction as the shell fabric—this will make it lie flat instead of puckering. If you’re working with a colored jacket, match the patch’s color as closely as possible (most brands offer black, navy, gray, and olive for this exact reason).
Now, for the sewing part. Thread your curved needle with the nylon thread, and tie a small knot at the end. Start by sewing the tear closed first, right along the edges of the fabric. Use a straight, small stitch (about 1 stitch per 1/8 inch) — don’t pull too tight, because that will pucker the fabric. Leave about half an inch of thread hanging when you start, and when you finish the tear, tie a double knot and trim the excess. Now, place the repair patch over the sewn tear. The patch should cover the entire tear and overlap 1 inch on all sides. Thread your needle again (you can use the same thread) and sew the patch onto the shell fabric, using a tiny, invisible stitch called a “ladder stitch.” This stitch is perfect because it’s nearly unnoticeable and flexible, so it won’t crack when you bend the jacket (like when you reach for a coffee mug). For the ladder stitch, you’ll weave the needle under the edge of the patch and the shell fabric, small loops at a time, keeping the tension even so the patch lies flat. Once you’re done, tie a double knot, trim the excess thread, and gently press the patch with a hair dryer on low heat for 10 seconds—this activates the patch’s thin adhesive (yes, most down repair patches have a tiny adhesive layer that helps it stick, not to replace sewing, but to reinforce it) and ensures it’s bonded.
Now, what if the tear is in the inner down chamber, and you see down feathers poking out? That’s trickier, but doable. First, you need to access the inner layer without pulling too many feathers out. For this, we lay the jacket flat, turn the inner layer inside out, and gently smooth the feathers away from the tear. You don’t need to remove all the feathers—just make sure the tear is exposed. Cut your patch a little smaller (about 1 inch around the tear) because the inner layer is less visible. Sew the tear closed on the inner layer first, just like you did on the outer shell. Then, place the patch over the inner tear, using the ladder stitch to secure it. Once that’s done, turn the jacket back right-side out, and you’re done. Just make sure you don’t pull too hard on the inner layer, because that can split the stitching holding the down chambers together.
Now, the mistakes we see people make all the time that turn a simple repair into a ruined jacket. First, using the wrong patch. Generic iron-ons are bad because they use a thick, heat-activated adhesive that can clog the shell’s breathable pores, making you sweat more and ruining the jacket’s ability to shed moisture. We had a customer send back a jacket last year where someone used a iron-on star patch; the adhesive ate through the nylon shell after three washes, and the tear got worse. Second, pulling stitches too tight. When you sew, tension is everything—too tight, and the fabric puckers, leading to more stress on the seam when you wear the jacket. Too loose, and the patch will pull off. Third, not prepping the area. Dirt or oil on the tear will make the patch not stick, so always lint roll the area first. Fourth, ignoring larger tears. If your tear is more than 2 inches long, or along a seam, DIY repair usually doesn’t work. Seams are stitched with heavy-duty thread, and ripping a seam and resewing it requires specialized equipment that most people don’t have. For those, take it to a local outdoor gear repair shop—most charge between $15 and $30, which is way cheaper than buying a new jacket.
Wait, but what about washing the jacket after a repair? That’s another common question. We always recommend waiting 24 hours after the repair to wash the jacket, so the patch’s adhesive has time to fully set. When you do wash it, use a down-specific detergent (regular laundry detergent has harsh enzymes that can break down the fabric and the patch’s adhesive) and wash it on a gentle cycle with cold water. Tumble dry on low heat, with a few dry tennis balls to fluff the down back up. Don’t dry it on high heat, because that can melt the patch’s adhesive.
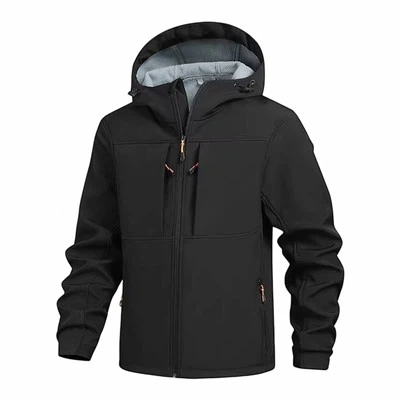
As a down jackets supplier, I’ll be honest: we’d rather you fix a small tear at home than throw a perfectly good jacket in the landfill. The average down jacket lasts 5 to 10 years with proper care, and most tears happen in the first year of ownership, usually from a sharp rock, a ski pole, or a zipper snag. Fixing that tear yourself saves you money and keeps a jacket out of the waste stream, which is a win for everyone. But here’s the thing: if you’re not comfortable with a needle, or the tear is bigger than 2 inches, don’t risk it. A bad repair can ruin the jacket, and that’s more waste than throwing it away.
Student Uniforms If you have questions about repairing your jacket, or you’re in the market for high-quality down jackets that are built to last (with reinforced seams and tough shells to minimize tears in the first place), feel free to reach out to our team to discuss your needs. We work with retailers, small businesses, and individual buyers, and we’re happy to help you find products that fit your lifestyle.
References
- Outdoor Industry Association. (2021). Backcountry Repair Guide: Down Outerwear.
- Gear Aid. (2022). Down Jacket Repair Best Practices for DIY Enthusiasts.
- International Down and Feather Testing Laboratory. (2020). Care and Repair of Down Insulated Apparel.
- Consumer Reports. (2023). How to Fix Common Outerwear Damage Without a Professional.
Anhui Lida Garment Co., Ltd
We are one of the most experienced down jackets manufacturers and suppliers in China, specialized in providing high quality customized service to global clients. Please feel free to wholesale bulk high-end down jackets from our factory. Also, free sample is available.
Address: Intersection of Gulou North Street and Wei-3 Road, Chengguan Town, Shucheng County, Lu’an City, Anhui Province
E-mail: leaderclothing2026@163.com
WebSite: https://www.leader-clothing.com/
