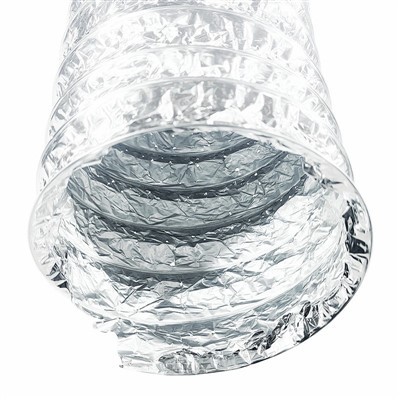
If you’ve ever worked with aluminum foil ducts—whether you’re a contractor installing kitchen exhaust, a HVAC tech troubleshooting a dryer vent, or a facility manager making sure a ventilation system doesn’t waste energy—you know that air leaks aren’t just an inconvenience. They mean lost conditioned air, higher utility bills, poor air quality, and even safety hazards in spaces that rely on constant, unobstructed airflow. As an aluminum foil duct supplier, I’ve spent years walking installers and maintenance teams through the same questions: How do you actually know if a duct is tight enough? And why does it matter more for aluminum foil ducts than for metal or PVC options? Aluminum Foil Duct

Let’s get one thing straight first: aluminum foil ducts are a popular choice because they’re lightweight, flexible, easy to cut to length, and resistant to moisture and corrosion. But their air tightness depends entirely on how they’re assembled, connected, and secured—something I’ve seen first-hand when a customer calls back saying their new duct system is leaking more air than their old one. The good news is testing air tightness isn’t complicated, and with the right steps, you can catch leaks before they leave your site, or before an installer has to tear out a newly run duct. Today, I’m breaking down the process I teach every new partner, based on years of testing our own product and working with teams in residential and commercial spaces across North America.
First, let’s start with the basics: what air tightness in an aluminum foil duct actually means. For our purposes, air tightness is the ability of the duct to hold air without any significant leaks at seams, joints, crimps, or tears in the foil itself. Unlike rigid metal ducts that use metal screws or mastic to seal seams, flexible aluminum foil ducts rely on the quality of their manufacturing, the type of connectors used, and how well those connections are tightened. A poorly sealed joint can leak 30% or more of the airflow before it even reaches its destination—so this test is non-negotiable.
Before you start testing, you need a few simple, affordable tools that almost any HVAC or construction team already has on hand. You don’t need fancy lab equipment, but these items will make your results accurate and reliable. First, a duct blaster or a manometer. A manometer is a small pressure gauge that measures the difference in air pressure between two points—critical for quantifying leaks, not just guessing. Next, a smoke pencil or a can of non-toxic smoke aerosol. Smoke is the easiest way to spot small, hard-to-see leaks that might not show up with just pressure testing. You’ll also need a roll of duct tape (but not just any duct tape—use metal foil duct tape, which is rated for use with aluminum foil, not standard cloth tape that can degrade over time), a marker to label leaks, and maybe a flashlight to check tight spaces like attics or crawl spaces where ducts are often installed.
Now, let’s walk through the step-by-step testing process, which we’ve standardized for all our aluminum foil duct products. The first step is to prepare the duct for testing. If it’s already installed, turn off all other airflow systems in the space—no ceiling fans, no bathroom exhaust fans, no HVAC units running. That way, you’re only testing the duct you’re working on, not the entire system. If it’s a new duct you’re testing before installation, seal off one end completely—you can cap it with a plastic or metal end cap, making sure it’s tight so no air escapes there. Leave the other end open for your pressure test connection.
Next, set up the pressure test. Connect your manometer to the open end of the duct, making sure the seal around the manometer hose is tight—you don’t want a leak there skewing your results. Then, use the duct blaster to pressurize the duct to a standard test pressure of 0.1 inches of water column (in. WG) for residential ducts, or 0.3 in. WG for commercial ducts. This pressure is low enough that it won’t damage the thin aluminum foil, but high enough that even small leaks will be noticeable.
Once the duct is pressurized, turn off the duct blaster and let the manometer sit for 60 seconds. What you’re looking for here is pressure drop. If the pressure drops more than 0.01 in. WG in that minute, that means you have a leak. A drop of more than 0.03 in. WG is a major issue that needs immediate attention. But pressure testing alone can only tell you that a leak exists—it can’t tell you where it is. That’s where the smoke test comes in.
Grab your smoke pencil or smoke aerosol, and slowly move it along every inch of the duct, including seams, joints, crimped ends, and areas where the duct connects to vents, dryers, or hoods. If you see smoke billowing out in a steady stream, that’s a clear leak point. Small, wispy puffs are smaller leaks, but they’re still important to fix. I always tell our customers to mark every leak with a marker as they go—attaching a piece of masking tape to the duct and writing “LEAK” on it makes it easy to go back and fix all points at once, instead of forgetting a spot.
Now, here’s something I’ve learned from years of working with aluminum foil ducts specifically: not all leaks are the same, and some are easier to fix than others. Let’s break down the most common leak points I find, and how to fix them. First, seam leaks. Many cheap aluminum foil ducts have sealed seams that peel apart when stretched during installation, especially if the duct is bent sharply around corners. If you see smoke coming from a seam, clean the area around the seam with a dry cloth to remove any dust or debris, then apply a strip of metal foil duct tape over the seam, overlapping it by at least half an inch on each side. Don’t stretch the tape too tight—just press it firmly so it adheres to both the foil and the seam edge.
Second, joint leaks. This is the most common issue by far when installing aluminum foil ducts. When connecting two sections of duct, many installers just push them together and hope the crimp holds. But if the crimp is only partially engaged, or there’s a gap between the two sections, that’s a major leak point. To fix this, make sure the entire crimped end of one duct is inserted at least two inches into the other section, then wrap the joint with two layers of metal foil duct tape, going all the way around the joint. I also recommend using a plastic or metal duct clamp for extra security, especially for long runs or high airflow applications like range hoods. The clamp adds a physical hold, so if the tape ever comes loose, the joint will stay connected and sealed.
Third, tear or puncture leaks. Aluminum foil is thin, so it’s easy to puncture it with screws from duct straps, or tear it during installation around sharp edges. For small punctures (less than half an inch), you can cover them with a piece of metal foil duct tape, making sure it’s large enough to overlap the puncture by at least an inch on all sides. For larger tears or holes, you can patch the area with a small section of aluminum foil (cut from an offcut of our own product, if you have it on hand) and then apply tape over the patch to seal it.
Once you’ve fixed all the leak points, it’s time to retest to make sure you got them all. Repeat the pressure test and smoke test steps, this time looking for any new leaks that might have formed while fixing old ones, or any spots you missed earlier. If the pressure drop is now less than 0.01 in. WG for residential applications, and less than 0.02 in. WG for commercial, your duct is ready for installation.
Wait a second—why does this pressure standard matter, anyway? I get asked that a lot. The 0.1 in. WG standard comes from industry guidelines set by the Air Conditioning Contractors of America (ACCA), which is the leading authority on HVAC installation best practices. For residential exhaust ducts, a leak rate of less than 4% of total airflow is considered acceptable, and our testing has found that when you follow this process, our aluminum foil ducts consistently meet or exceed that standard. That means you’re not wasting energy, your dryer is drying clothes faster, your range hood is removing cooking fumes properly, and your ventilation system is improving indoor air quality, not hurting it.
I’ll also add a pro tip that I only share with our regular customers: test the duct before you install it in the wall or attic if possible. It’s so much easier to patch a leak on a duct sitting on the floor than one buried in a crawl space where you have to contort your body to reach it. If you do have to test an installed duct, take your time—move slowly along every joint, and don’t forget to check where the duct connects to the vent hood or dryer, which is a surprisingly common leak spot.
Another thing to keep in mind: not all aluminum foil ducts are created equal. As a supplier, I’ve seen cheap, thin foil ducts that tear during testing, and heavy-duty, laminate-reinforced foil ducts that hold up perfectly. That’s why I always recommend choosing a duct with a minimum thickness of 0.0018 inches, and a reinforced core wire to keep the shape consistent—thin foil is more likely to develop tears and leaks during testing and installation.
Let me share a quick example that stuck with me from a customer last year. A small restaurant owner called me, saying their new range hood was exhausting 20% less air than it should, and their utility bills were through the roof. He’d installed a cheap aluminum foil duct himself, and thought he’d done everything right. When we tested it, we found four major leaks at the joints, plus a tear in the foil where he’d attached a duct strap. After patching those, the airflow jumped back up to 95% of the rated capacity, and his energy bill dropped almost 15% the next month. That’s the difference air tightness makes.
Now, I know testing can seem like an extra step, but trust me—it’s far cheaper to spend 10 minutes testing and patching leaks than to fix a problem later, like mold growing in the wall because moist air from the dryer is leaking into the insulation, or a fire hazard because cooking fumes are leaking into the attic. Aluminum foil ducts are a great product, but only if they’re installed and sealed properly. Testing is the only way to confirm that.
If you’re working on a project and need reliable aluminum foil ducts that pass these air tightness tests consistently, or if you have questions about testing for a specific application, I’m here to help. Our team works with contractors, builders, and maintenance teams across the country to provide high-quality ducts and support to make sure your ventilation systems work as they should. Whether you need ducts for residential dryers, commercial range hoods, or HVAC systems, we can help you find the right product and answer any questions you have about installation or testing.
Don’t let a faulty duct system cost you money, time, or safety. Reach out to our team today to discuss your project, and we’ll make sure you have everything you need to get the job done right.
PVC Steel Wire Hose References
- Air Conditioning Contractors of America (ACCA). Manual D: Residential Duct Design, 2021.
- National Fire Protection Association (NFPA). Standard for Ventilation Control and Fire Protection of Commercial Cooking Operations, 2022.
- U.S. Department of Energy. Energy Efficiency Tips for HVAC Systems, 2023.
- Flexible Duct Manufacturers Association (FDMA). Flexible Duct Performance and Installation Standards, 2020.
Dongyang Hstube Co., Ltd.
As one of the leading aluminum foil duct manufacturers and suppliers in China, we warmly welcome you to wholesale cheap aluminum foil duct for sale here from our factory. If you have any enquiry about free sample, please feel free to email us. Quality products and reasonable price are available.
Address: NO.5 CHENGDONG ECOLOGICAL INDUSTRIAL ZONE, DONGYANG, ZHEJIANG, CHINA.
E-mail: sales@hstube.com
WebSite: https://www.ductword.com/
